Xen Full Virtualization Example
İçindekiler
Preface
This is an example of obtaining full virtualization environment by Xen 3.0.2 packaged in SUSE 10.1.
In this document, topics specified for full virtualization-not the conventional paravirtualization- are discussed. For general information , see [Xen's document site].Some of these may be included in SUSE 10.1's /usr/share/doc/packages/xen.
| In some environment, this example might freeze your whole system. Then you would have to use hardware reset. I strongly recommend you would try it in an experimental environment, not the important one.
A solution for freezing problem may help. |
Environment
Hardware
For Full Virtualization, a CPU with virtualization support is required. The list of suitable CPUs may be helpful.
An ATX PC was assembled for this attempt.
- CPU: Intel Core Duo T2500
- RAM: 1000 Mb
- Motherboard: ASUS N4L-VM-DH (This motherboard a needs a power unit with 24pin connector).
- HDD:Serial ATA
SUSE version
SUSE Linux 10.1 Released, for x86 architecture
Xen Installation
At the same time of SUSE installation. Select "XEN virtualization" category in YaST software management.
Binary OS for DomU
Windows XP Professional
Method
Create a Blank Disk Image to install
#cd /var/lib/xen/images
#dd if=/dev/zero of=windisk.img bs=1k seek=4096k count=1
#dd if=/dev/zero of=windisk.img bs=1k count=1 conv=notrunc
Edit Configuration File
Edit /etc/xen/examples/xmexample.hvm to make two types of configuration file. One for booting from CD at the first seup, and booting from HDD afterwards.
- myxm.hvm(for CD boot)
Modify following lines and leave the rest as default.
# Initial memory allocation (in megabytes) for the new domain.
memory = 384
disk = [ 'file:/var/lib/xen/images/windisk.img,ioemu:hda,w' ]
on_poweroff = 'destroy'
on_reboot   = 'destroy'
on_crash    = 'destroy'
# Disk image for
cdrom='/dev/sr0' #set proper device name for your own environment!
# boot on floppy (a), hard disk (c) or CD-ROM (d)
boot='d'
# enable SDL library for graphics, default = 0
sdl=1
# enable VNC library for graphics, default = 1
vnc=0
# enable spawning vncviewer(only valid when vnc=1), default = 1
vncviewer=0
- myxmhdd.hvm(for HDD boot)
Save myxm.hvm as myxmhdd.hvm and edit only boot description.
# boot on floppy (a), hard disk (c) or CD-ROM (d)
boot='c'
Locate myxm.hvm and myxmhdd.hvm in /etc/xen/vm.
Spare Dom0 memory for DomU
This may improve stability of VM for Windows. I got an info in Xen mailing list it's worth to try to spare bigger memory to domU if it wouldn't work well.
#xm mem-set 0 <properly reduced size>
First Boot of VM for Windows Setup
Be sure to insert Windows setup disk in the drive first.
#cd /etc/xen/vm
#xm create myxm.hvm
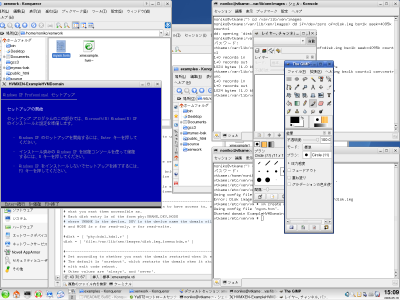
After a pause, a little window appears and setup begins (a blue-screend one in the snapshot below)
Proceed the setup as usual in Window's way. When copying of files is done, this window dissapears. You should reboot the vm manually.
Boot VM from HDD
In /etc/xen/vm directory,
#xm create myxmhdd.hvm
The little window reappeard and Windows setup continues. When you use mouse in VM window, the cursor is grabbed within it. To go back to SUSE desktop, press Ctrl+Alt keys.
SUSE Linux 10.2 Alpha2
Full virtualization could be built only with GUI operation of YaST VM Management in above hardware environment.
| In above hardware environment, Installation of the SUSE development version by YaST may fail (Alpha2 Bug). Use text mode in Installation. |
Need for any new information!
