SUSE üzerinde KDE masaüstü için MS TrueType Core Yazı tiplerinin optimal kullanımı
NOTE : This tutorial is KDE centric. If someone is a Gnome user, it should be fine to create another WIKI page with a good sharp rendering of MS TT Core Fonts on Gnome, how to have a good rendering of the Qt apps running on Gnome...
TODO : Could correct my poor English? ;o) TODO : Add picture SaX2 screen config showing the setup of physical size of monitor to give 96 dots per inch
İçindekiler
Introduction
How to render fonts on Linux is a passionate debate, as some people prefer anti-aliased fonts, where others prefer rendering to be sharper, such as how a Microsoft Windows system will look if ClearType is disabled (this is often the case except on some laptops with a restoration CD).
If you are not particularly happy with the stock SUSE font rendering, this document could make you really happy with a good visual feeling on SUSE.
You can find a how-to on the subject here : http://avi.alkalay.net/linux/docs/font-howto/Font.html but this WIKI document is SuSE centric.
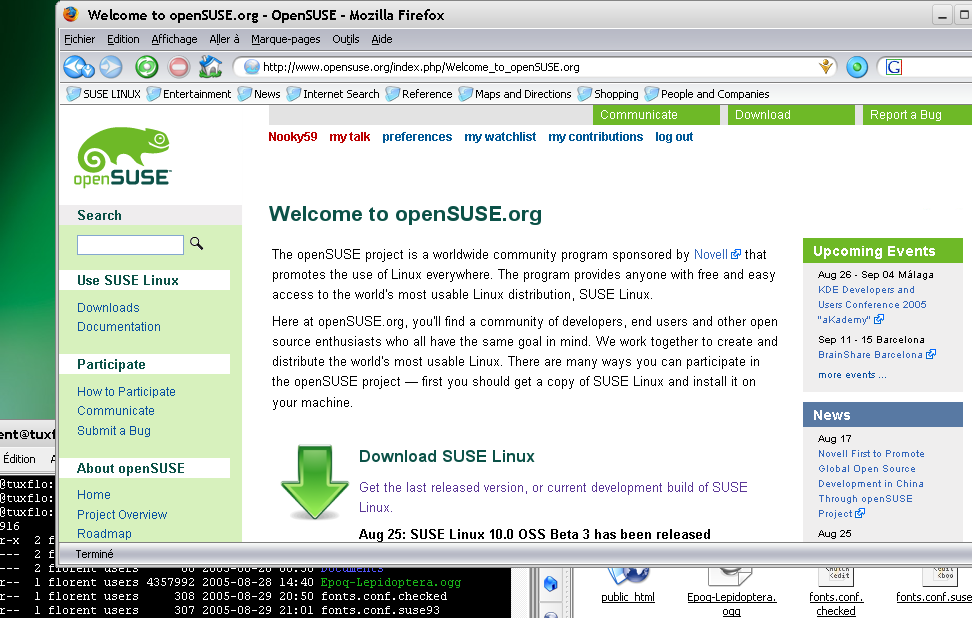
In order to decide if this tutorial is for you, here is a picture of the kind of rendering you will have with this tutorial.
Notice that the small fonts are rendered sharply for a better reading experience but the bigger ones are anti-aliased (take a look at the sentences "Welcome to openSUSE.org" and "Download SUSE Linux").
The Bytecode Interpreter
In order to get a good rendering of the MS TrueType Core Fonts, the BYTECODE_INTERPRETER setting should be enabled in freetype2. The freetype people do recommend not to use the bytecode interpreter anymore in favour of their auto hinting code but while it's true you will achieve good rendering with most of the free fonts, this is quite ugly for the MS TrueType Core Fonts.
On SUSE 9.3, this is not enabled by default so you should get the freetype2 source RPM, uncomment the line at the bottom of the spec file regarding the Patch Number 100, then rebuild the RPM and install it.
Refer to the SUSE documentation in order to learn how to rebuild a RPM package.
On SUSE 10.0, freetype2 is already compiled with the Bytecode Interpreter enabled so you do not need to do anything to freetype.
Disabling anti-aliasing and hinting
SuSE 9.3
With SuSE 9.3, the only thing you can do is to go to
KDE control center --> Appearance & Themes --> Fonts
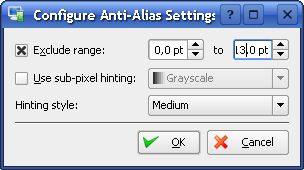
and uncheck "Use anti-aliasing for fonts". Perhaps you prefer to keep anti-aliasing for large fonts. In this case, leave the box checked but click on the Configure button, check the box "Exclude range" and choose a range. In my case, it's 0 to 11 points, but I will tell you how you can determine the higher bound later in this tutorial.
SuSE 10.0
In SuSE 10.0, go to YaST -> System -> /etc/sysconfig Editor and change value of Desktop -> BYTECODE_BW_MAX_PIXEL to 18.
You can accomplish the same by editing /etc/sysconfig/fonts-config and changing the value of BYTECODE_BW_MAX_PIXEL.
Installing the fonts
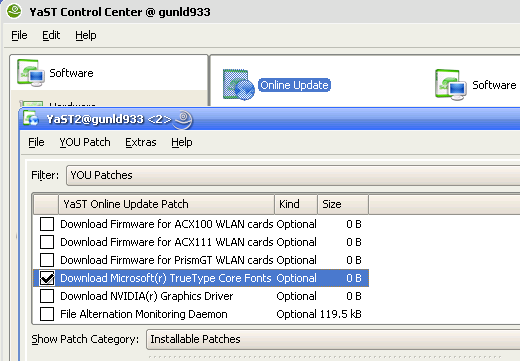
We will use the Microsoft Core Fonts. You should get them from YaST Online Update, the SuSE update manager.
The fonts are: Andale Mono, Arial, Comic Sans MS, Courier New, Georgia, Impact, Times New Roman, Trebuchet MS, Verdana and Webdings. Andale and Courrier are monospaced fonts good for your terminal apps. Georgia is great as the standard font for your web browser. Its italics are way better than Times New Roman.(try it out on slashdot.org and you will see what I mean) Another Microsoft font called Tahoma is fantastic at small sizes. But unfortunately, it is not available in the Microsoft Core Fonts. It has a perfect rendering for small text, so it is nice for the standard KDE font, file explorer, buttons, menu, taskbar and so on.
To use it legally, you need to have a licensed Windows system. You can then import it from your Windows partition if this is on the same computer or from a floppy, an USB-key...
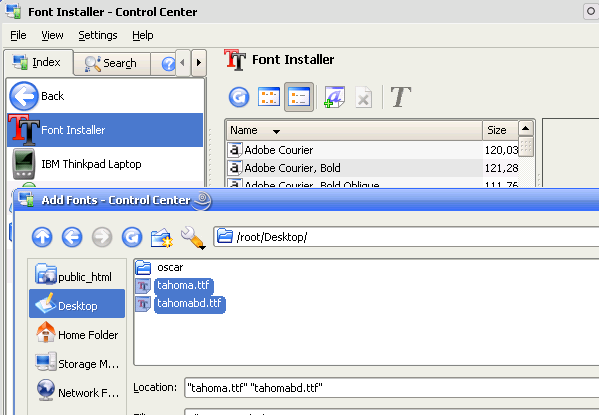
It is really easy to import. Simply go the KDE control center --> System Administration --> Font installer --> Administrator Mode (you will need to privide the root's password) --> Add Fonts.
Then browse to the location of the fonts, (the Windows partition, floppy, USB-key, ...) and add both tahoma.ttf and tahomabd.ttf
If you are unsure about the legal stuff then use Verdana as your standard system font. It has great screen rendering at small sizes. On 96x96dpi a size of 9 is good.
Now, we will need to restart the X session. To do it, press on CTRL + ALT + BACKSPACE, or Log Out.
Settings for KDE
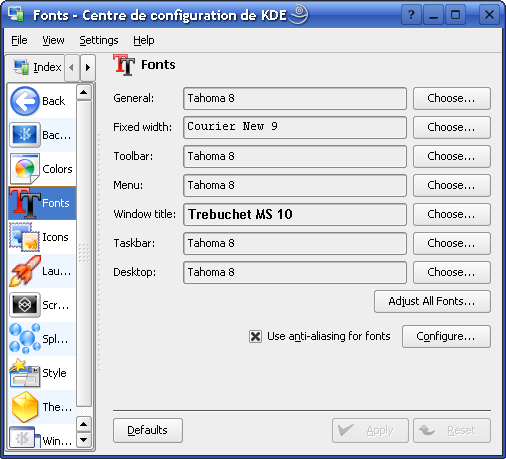
Here are my settings for KDE. It reproduces the fonts used in MS Windows. Notice that the font size is dependent on the screen resolution. In my case, my screen resolution is 99x99 dots per inch.
You can find your screen resolution with the command:
 $ xdpyinfo | grep resol
     resolution:      96x96 dots per inch
You can find your screen dimensions with the command:
 $ xdpyinfo | grep dimen
     dimensions:      1024x768 pixels (271x203 millimeters)
Note that MS Windows assumes your screen resolution is 96x96 dots per inch. You cannot directly change the resolution. It comes from (pixels/length x 25.4). In the example above, (1024/271 x 25.4 = 96) dots per inch. In SaX2 you can choose your video mode (pixels) and also set the dimensions (millimeters); you will have to change the millimeters and do the math to get your 96 x 96 dots per inch. After you change these values, you will have to log off and in again. Check the dpi again with "xdpyinfo | grep resol" to see that it worked. You might have to tweak a millimeter here or there to get it to exactly 96 x 96 dots per inch.
If your screen resolution is 75x75, add 3 to the size of the fonts shown below.
(There are lots of pics on the web with Tahoma 8, all of them have a broken rendering of the character "8". The bottom circle always has one pixel too many. If anyone knows how to fix it then please append the fix on this page or link to it.)
SuSE 9.3
If you want to keep anti-aliasing for the larger fonts, you should keep the checkbox "use anti-aliasing for fonts" checked and deal with the "Exclude Range" by clicking on the "Configure" button.
To choose the good value for the higher bound, look in the window where you can choose a font for a KDE item and increase the size of the font from the size set for KDE and look at the preview to see which size is the last one where the font looks thin before it seems to be bold. Choose this value as the higher bound for the Exclude Range.
In my case, Tahoma seem bold from a size of 12 so I set the higher bound of the range to 11.
Finally, I left the trick as it is, but the higher bound given above isn't enough. Too many sizes are anti-aliased so I used the first "bolded size" as the higher bound, which, in my case was 12.
Some Qt apps that require the root privileges, such as YAST, won't be rendered sharp if you don't apply the same KDE settings to the root account. Login on KDE with the root account or copy the good conf file (TODO : determine the good file and show the command to enter) to the root directory.
Settings for Firefox & Thunderbird
The default settings for Firefox on SuSE 10.0 are really good if you apply the earlier steps.
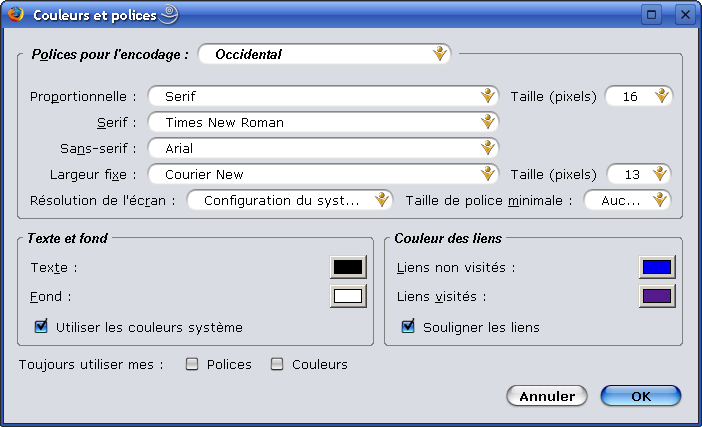
Here is a screenshot of the same Firefox settings as in MS Windows but I don't think this is necessary on SuSE 10.0, perhaps on SuSE 9.3...
Settings for OpenOffice
For OpenOffice, you must go the General Preferences page, then in the display section, you should set a threshold of 18 pixels before the fonts are anti-aliased.
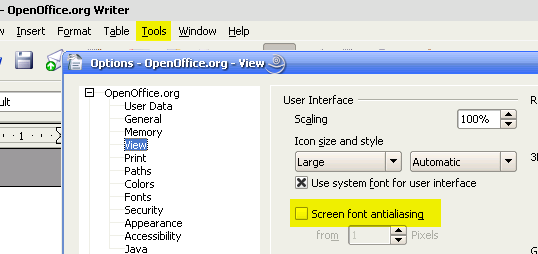
For OpenOffice 2.0, start one of the programs and go to Tools > Options and change the antialiasing as above or disable it.
Settings for GTK2 Apps running on KDE
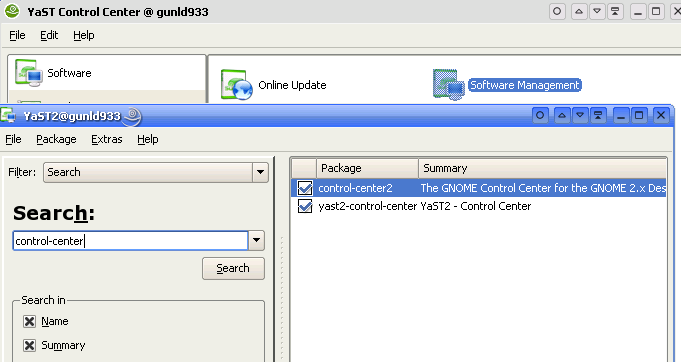
There might be a better way to do this without installing several dependent packages, but for the moment, this is the way it works. ;o) Here is how you do install it in YaST. YaST will complain about dependencies, just let it install them for you.
In order to setup the GTK2 apps fonts, you must, if this is not already installed, install the package control-center2.
Then launch Control Center from your current user:
$ gnome-font-properties
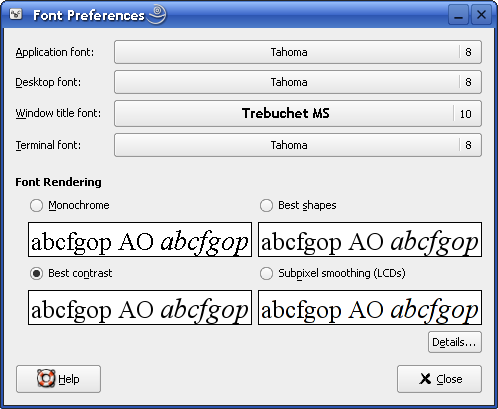
And make the following settings
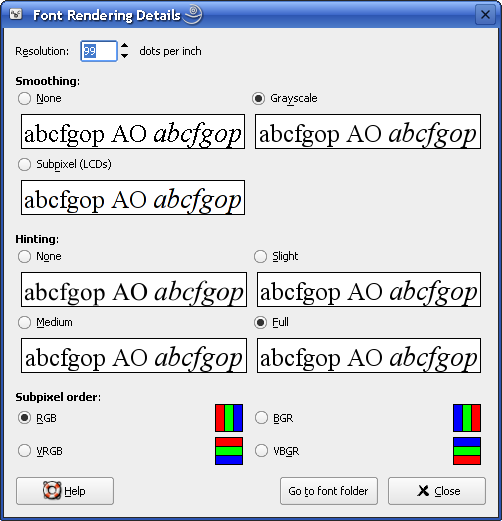
Then, you must click on the details button and set the same resolution you've seen earlier with the xpdyinfo | grep resol
As you can see, if you launch a GTK2 app, such as Firefox, the menu and the navigation bar use the same Tahoma 8 font as in KDE.
But, this is not enough. There is one last step to do in the GTK2 setup that will be made each time a KDE session is launched.
$ ln -s /opt/gnome/lib/control-center-2.0/gnome-settings-daemon ~/.kde/Autostart/
